Everything Divecut does
Divecut is what you open first — before Premiere, before Resolve, before you've decided anything. Plug in a card and every clip is already there: no import wait, no proxies to generate. See your Log footage in the color you shot it for, right in the grid. Rate and reject from the keyboard, search in plain words instead of scrolling, then send your picks to Resolve — in order, Log intact — for your editor to grade from the real file.
A footage browser for macOS and iPad. Your files stay where they are, nothing is uploaded, and nothing is rendered behind your back. Last updated August 25, 2026.
See it in the right color
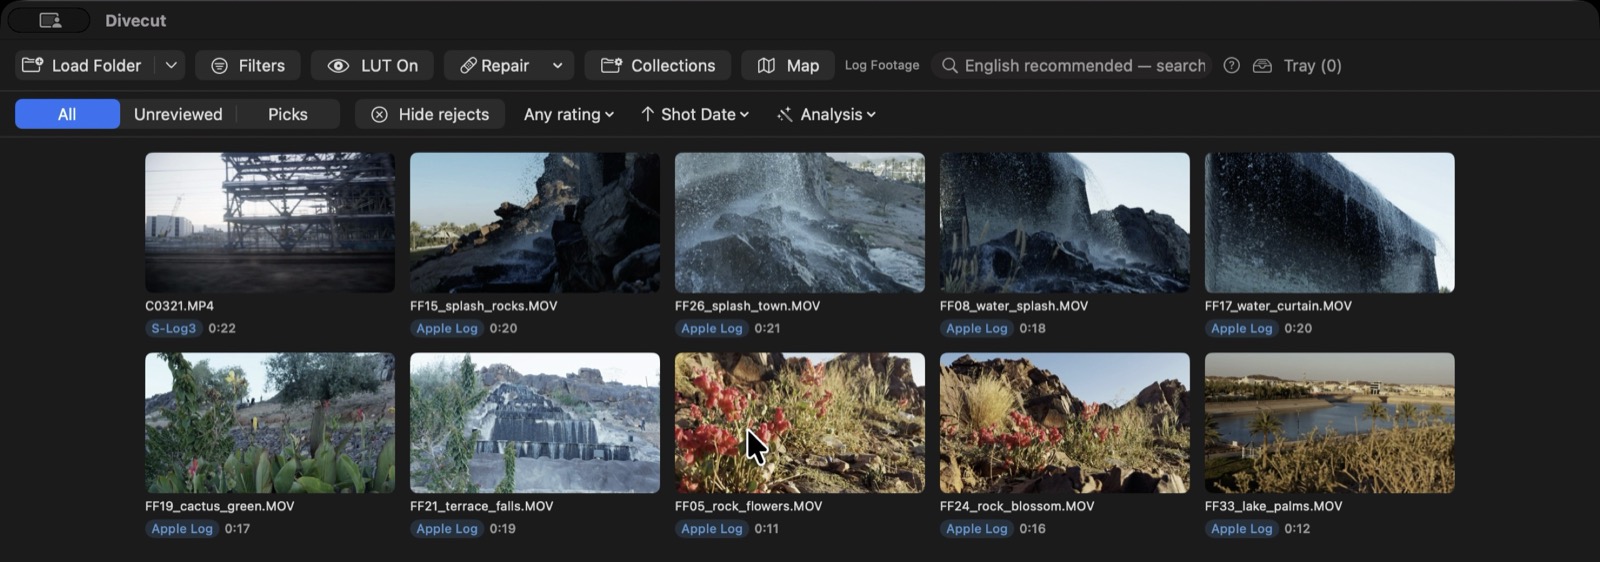
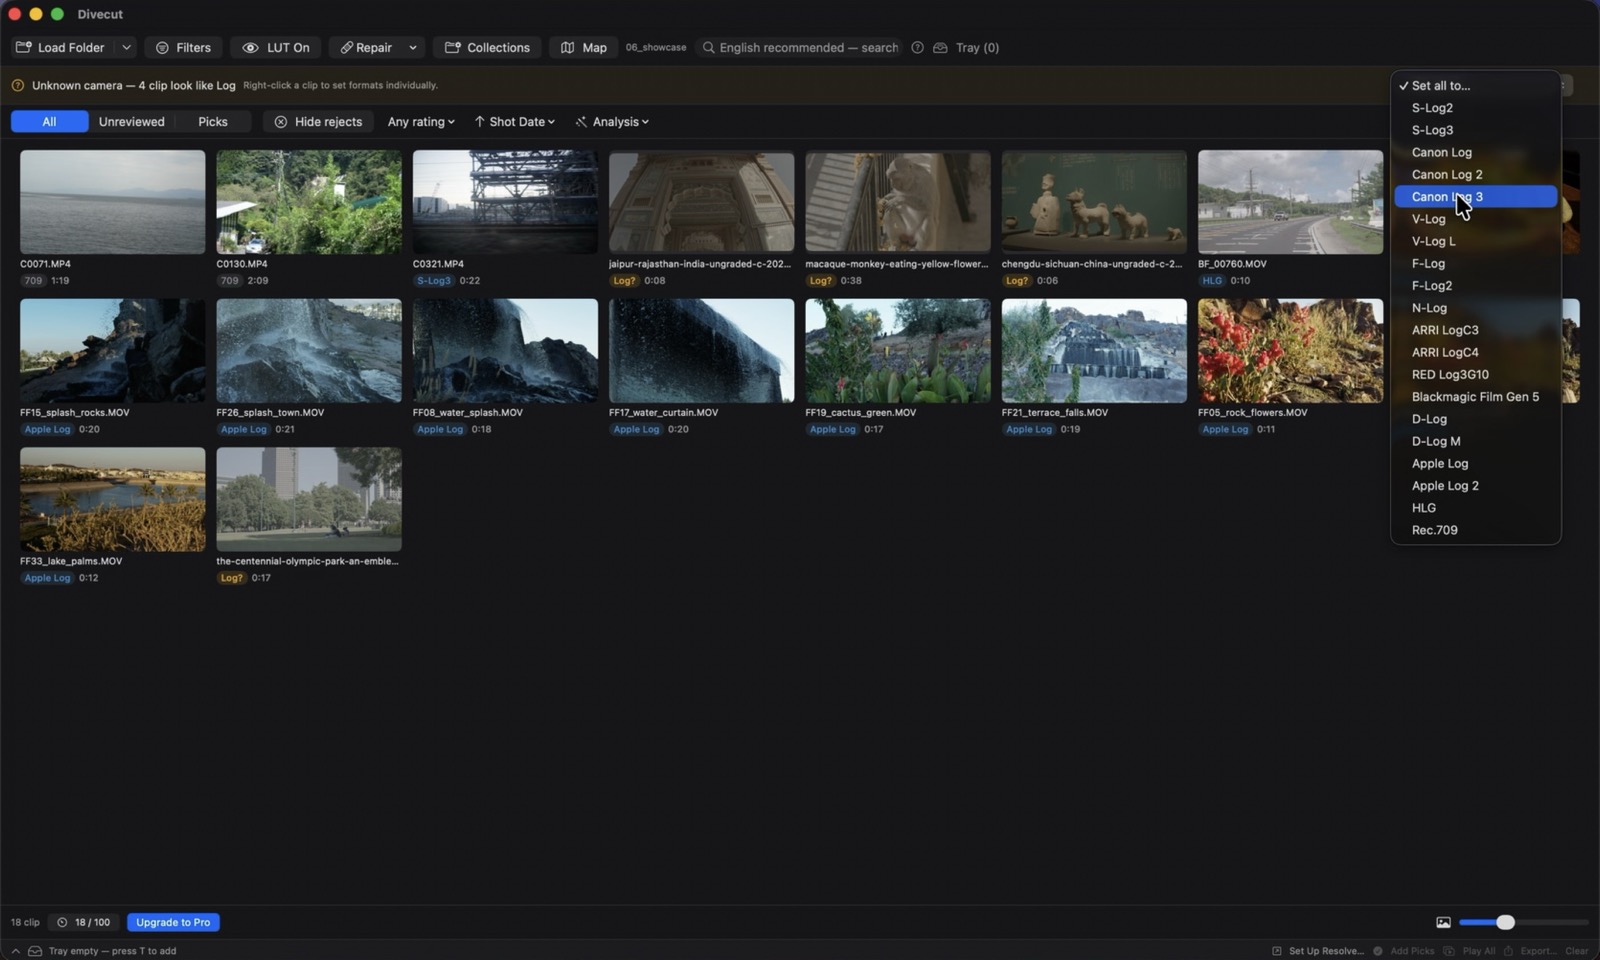
- Automatic Log detection
- Reads what the camera actually recorded — maker notes, embedded XML, vendor boxes — instead of guessing from the picture.
- 16 conversions built in
- Apple Log, S-Log2, S-Log3, V-Log, F-Log, F-Log2, N-Log, LogC3, LogC4, Log3G10, C-Log, C-Log2, C-Log3, D-Log, Blackmagic Film Gen5, and HLG.
- Per-camera rules
- Tell it once what a camera shoots. Every clip from that camera follows, including the ones you import next month.
- Your own LUTs
- Load any .cube and assign it per Log format, or point Divecut at the LUT folder your editing app already uses.
- Badges that don't lie
- “S-Log3” when the file says so. A quiet “709” when that is confirmed. “709?” when it is only an assumption. “RAW” for RAW. You can tell what is known from what is guessed.
- Show the raw Log
- Turn every conversion off with one switch to see the flat original. Display only — exports are unaffected.
- Waveform and vector scope
- Measured on the picture you are actually looking at, not on the untouched Log.
- Focus and exposure readout
- A focus score plus clipped and crushed percentages. Sort a folder by focus, flag the blown clips. Nothing is deleted for you — it marks and sorts, you decide.
- Simple corrections
- Exposure, contrast, saturation, temperature. Four controls, non-destructive, never written into your files.
- Anamorphic desqueeze
- 1.33× to 2.0×, applied everywhere from the grid to the export.
Read the footage
- Video
- H.264, HEVC, ProRes and ProRes RAW, plus whatever else macOS reads. MXF / X-OCN once the professional codecs and a matching decoder are installed.
- Portrait video, right side up
- Clips shot vertically rotate correctly everywhere — grid, player and export.
- Blackmagic RAW
- Thumbnails, scrubbing and playback (video only).
- Stills
- JPEG, HEIF, PNG, TIFF and camera RAW — ARW, CR3, NEF, RAF, DNG, ORF, RW2 and more. Sony stills shot in S-Log3 or HLG are recognized and color-corrected the same way video is. When the OS cannot develop a brand-new camera yet, it falls back to the embedded preview rather than showing you nothing.
- Audio files
- Kept in the library alongside the picture. Divecut does not edit sound.
- Metadata inspector
- Camera, lens, exposure, color tags, Log format, audio layout. Read from the file every time you open it, not from a stale copy.
- Timecode
- HH:MM:SS:FF, so the numbers match what your editor shows.
Cull it
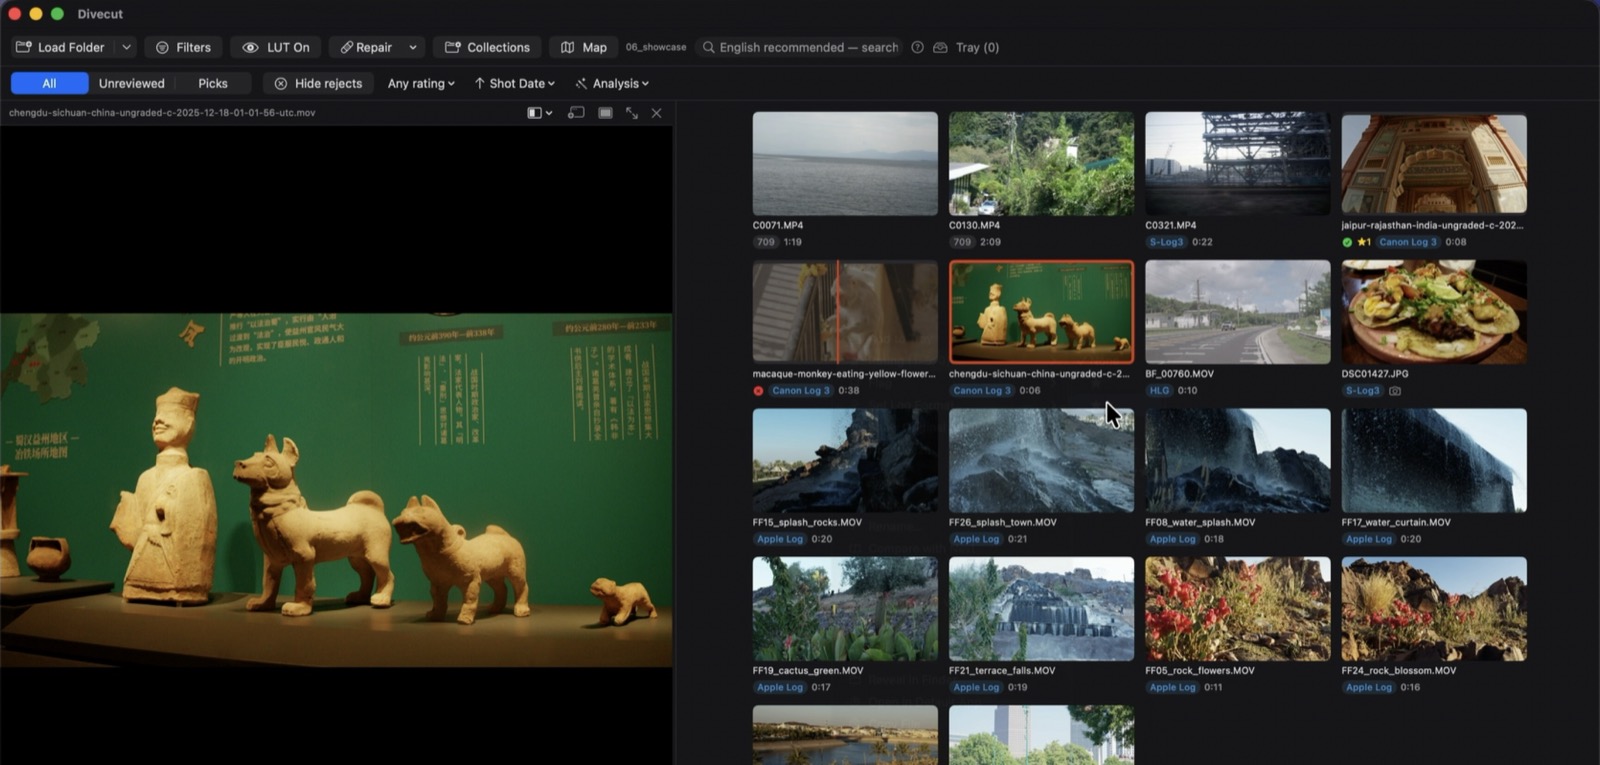
- The whole review runs from the keyboard
- Ratings, pick and reject, in/out points, send to tray, markers, undo. No dialog, no mouse.
- Remap the keys
- If the defaults fight your muscle memory, change them.
- Filters
- Unreviewed, picks only, hide rejects, minimum rating, hide exposure warnings. Bulk actions only ever touch what is on screen.
- Scrub in the thumbnail
- Hover or drag across a clip in the grid to see what is inside it, without opening it.
- Multiple selection
- Rate, tray and export many clips at once.
- Markers
- Several per clip, each with a color and a note — they arrive as timeline markers when you send the clip to Resolve.
- Compare
- Wipe or side by side — drag the divider to check focus and exposure against another clip.
- Set the thumbnail from the player
- Stop on the frame that represents the clip and press S, or pick any photo. Divecut writes it next to the clip as a PNG (see Custom thumbnails below) and the grid updates at once.
- Notes
- Write on any clip. Notes are searchable, and travel to Resolve as Media Pool comments when you hand off.
Find it again
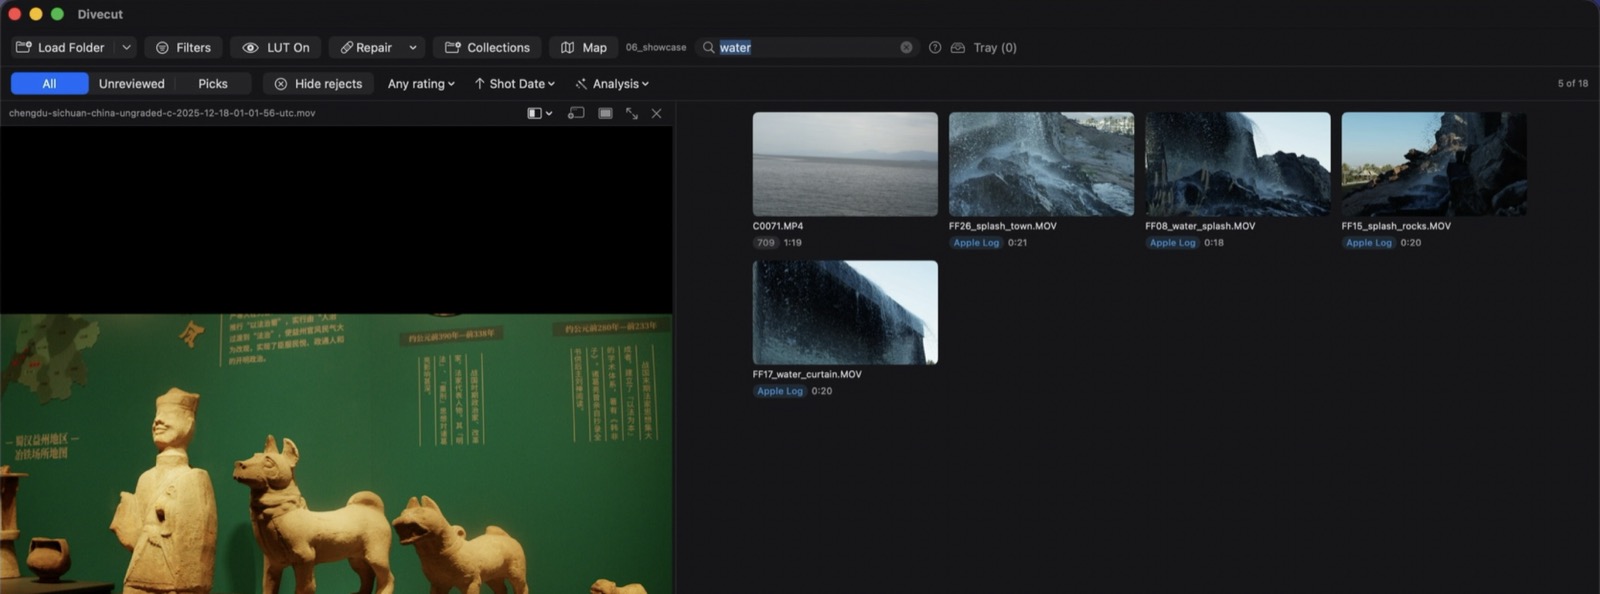
- Search in plain words
- “waves on rocks”, “person on a bridge”. On-device AI looks at the footage for you. Nothing is uploaded — it works with the network off.
- Jump to the moment
- Open a hit and the playhead is already at the frame that matched.
- Similar clips
- Start from a clip you have and find the ones that look like it.
- Metadata search
- Camera, Log format, resolution, frame rate, duration, orientation, file type, rating, flag, GPS presence — filter on any of them, combined.
- Collections and sorting
- Virtual folders that never move a file. Sort by shot date, added date, duration, size or name.
- Map
- Where your GPS-tagged clips were shot, drawn from bundled vector data. No map service, no requests.
- GPX import
- Match a track log against timestamps to place clips that have no GPS of their own.
Hand it off
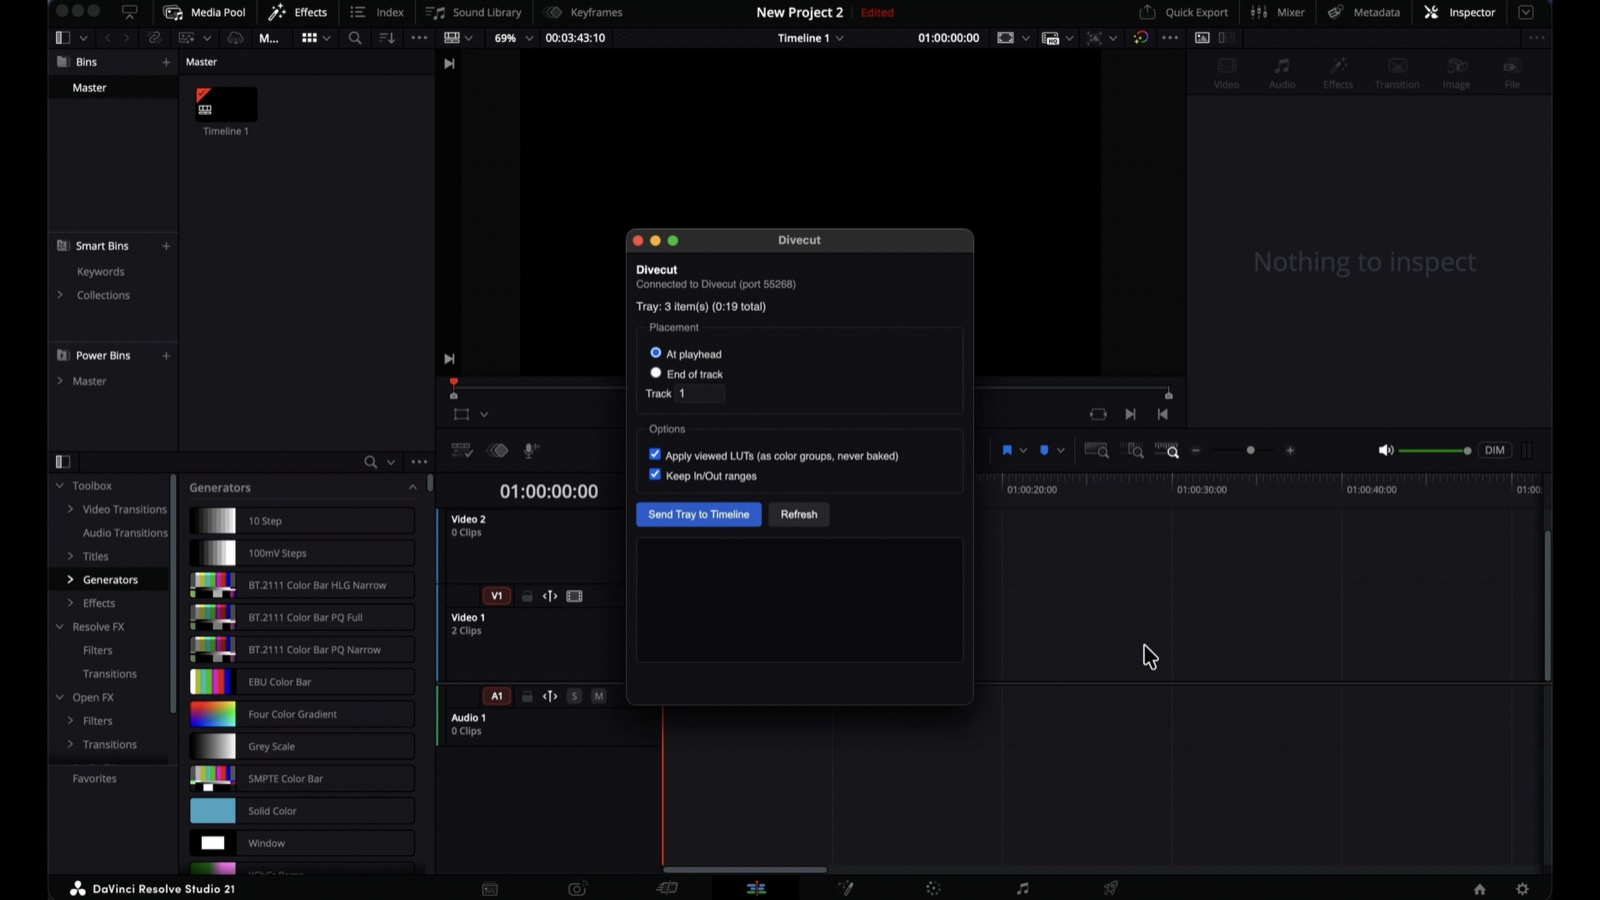
- The tray
- Collect ranges as you go, reorder them, and play the whole tray through before you send anything.
- Fix a range without starting over
- Click a tray thumbnail to reopen it with its in/out already loaded, adjust them, and save back to the same item — no delete-and-redo.
- Drag out to any editing app
- File references, Log intact. Nothing is copied or converted on the way.
- One-click plugin setup
- Point Divecut at your Resolve folder once and it installs — and repairs — the Workflow Integration plugin. No manual file copying.
- Send to DaVinci Resolve
- Ranges land on the timeline with the correct length, ratings and notes come along, and the viewing LUT arrives as a color group — applied, never baked. Your grade starts from the original file.
- Lists for other tools
- ALE for Avid, and a CSV of your selects with timecode, rating, notes and camera details.
Make new files
This is the only place where the conversion may be baked in — because here you are asking for a new file, not handing over the original.
- Stills and video
- With or without the Log conversion burned in. Your choice, every time.
- Presets
- Vertical and square for social, client review, proxy, or trim only.
- Frame rate and aspect
- Set them on export. Speed is never changed — lowering the rate drops frames, and raising it never invents new ones.
- Contact sheets
- A whole card on one page.
- Combine the tray
- One file, in the order you arranged. No transitions — this is a review copy, not an edit.
- Batch transcode
- A queue for converting many clips at once.
- Verified copy
- Card to disk with a hash check and multiple destinations, and the copy can be imported as it lands.
- Rename clips
- One clip: type a new name. Several at once: a prefix, the shooting date, and a running number. The one feature that touches your originals, and only the name — never the contents. It refuses to overwrite and rolls back on failure.
Look after the library
- Your files stay put
- Divecut stores references and its own metadata. It never moves, converts or rewrites your footage.
- Follows a folder
- Move or rename it in Finder and the library catches up on the next launch — ratings, ranges and search index intact.
- Tells you what is missing
- Footage that has gone offline is flagged instead of silently disappearing.
- Repair menu
- Rebuild thumbnails, re-read metadata, or clear out clips that have gone missing — one folder at a time or across the whole library. No “please reinstall”.
- Custom thumbnails
- Name a PNG thumb_ followed by the clip's file name (thumb_A0001.png next to A0001.MOV), drop it in the same folder, and it becomes the thumbnail — no database, no import step. Divecut can also write one for you from the current frame or from an image you pick. Other apps that import the folder will see those PNGs too.
- Card detection
- Plug in a card and Divecut offers to import — after asking, never on its own.
- Free tier that gives slots back
- The first 100 clips are free. Detach a folder to free the slots — your ratings, ranges and notes stay, and putting it back restores everything.
Platform, privacy, and the small print
- macOS 15+ and iPad
- The same app. Everything works on both except the Resolve integration, which exists only on macOS because DaVinci Resolve does not run on iPadOS.
- Seven languages
- English, 日本語, Español, Deutsch, Français, 한국어, 简体中文. Switch without restarting.
- No account, no cloud, no telemetry
- The only network traffic in the whole app is the purchase check. Search, conversion and analysis all run on your machine.
- Local API for tinkerers
- An optional MCP server so your own tools can query the library. Off by default, loopback only, token required.